
Under the fan outfit change: a skill that turns one photo into a reel
The #underthefan reel where every ceiling fan blade swaps the outfit. Attach one skill file and one photo, and YouViCo's AI Agent makes the keyframes, clips, fan, transitions, music, and export.
- Runs in
- YouViCo AI Agent · attach the skill file in chat
- Difficulty
- Beginner
- Time
- 5 min setup, plus agent run time
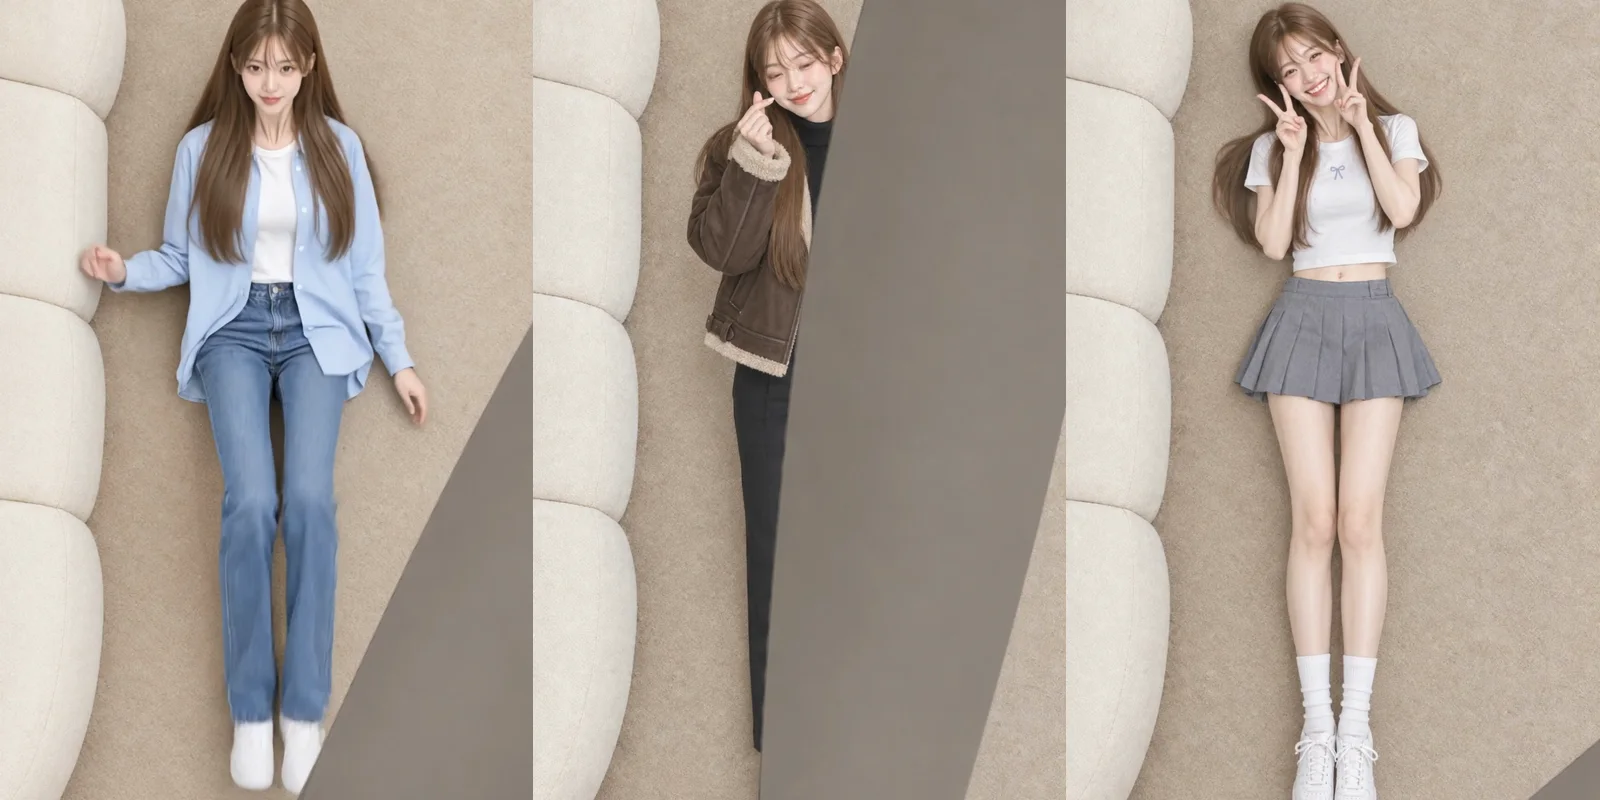
Results
Each time a blade passes over the body, the next look takes over. Without a look list, the skill uses these four.
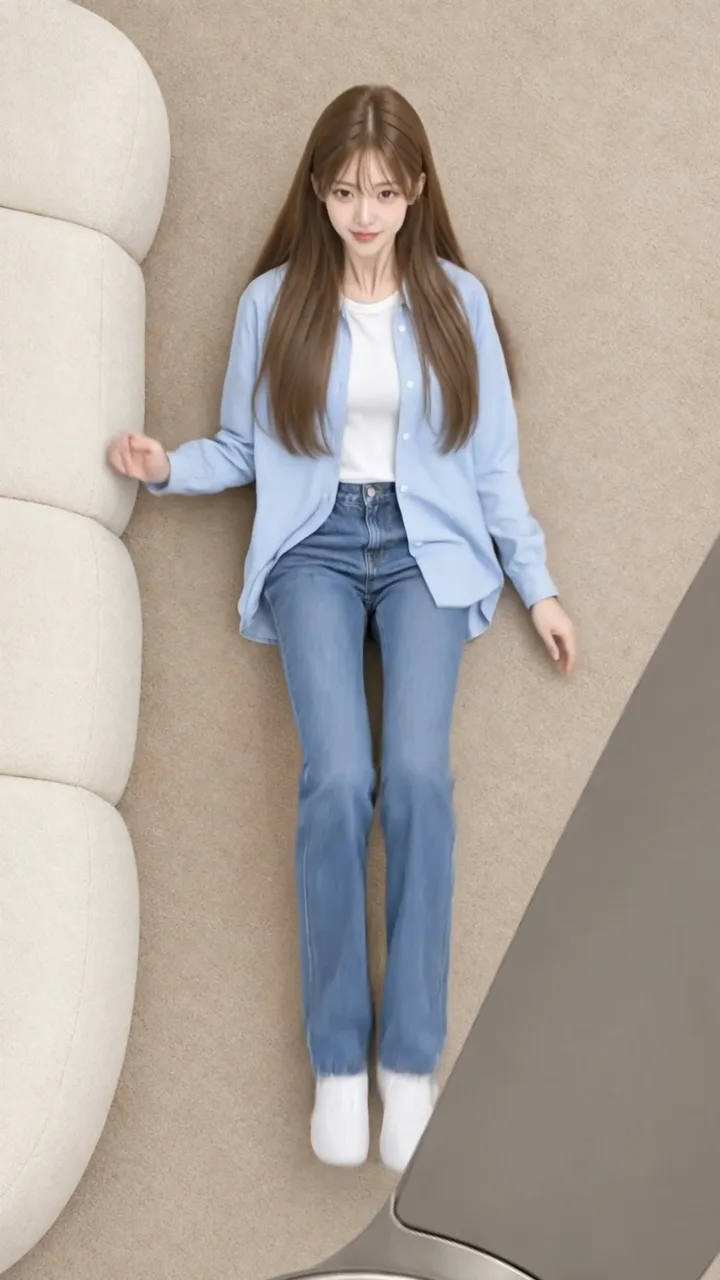
Result Look 1. Shirt jacket and jeans. The intro, rolling off the sofa onto the carpet, opens in this look.
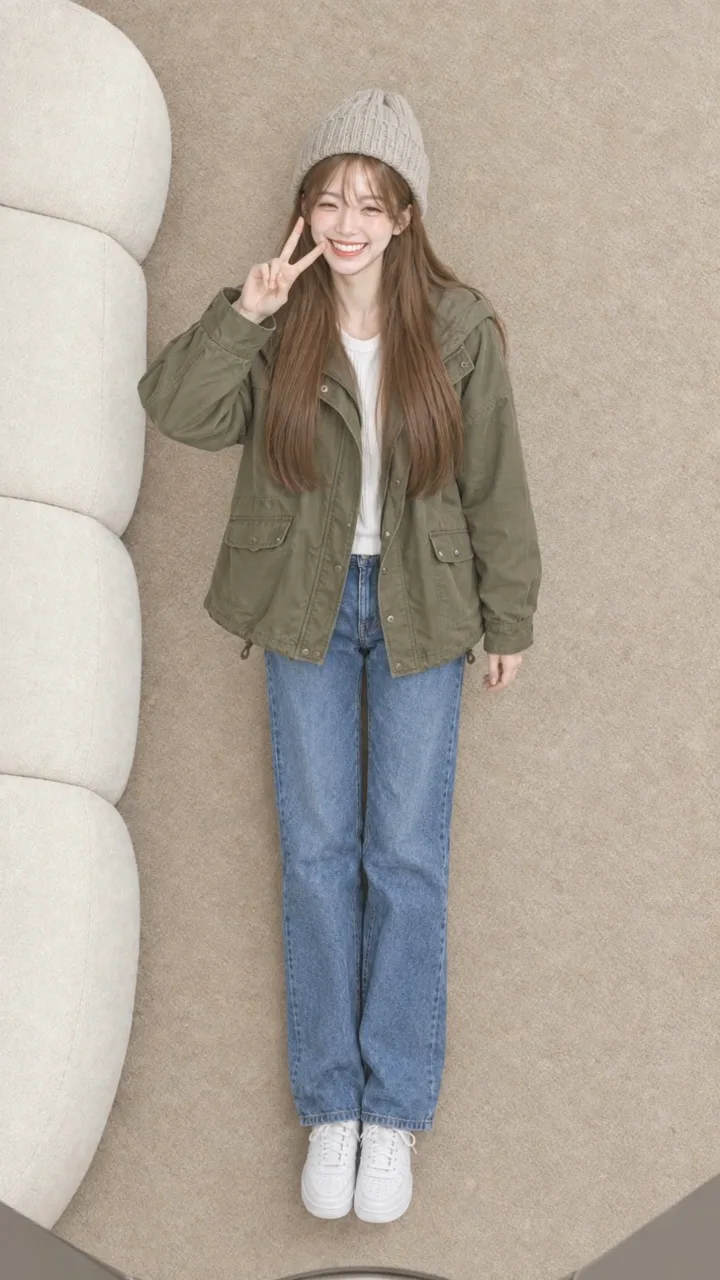
Result Look 2. Field jacket, beanie, and wide denim.
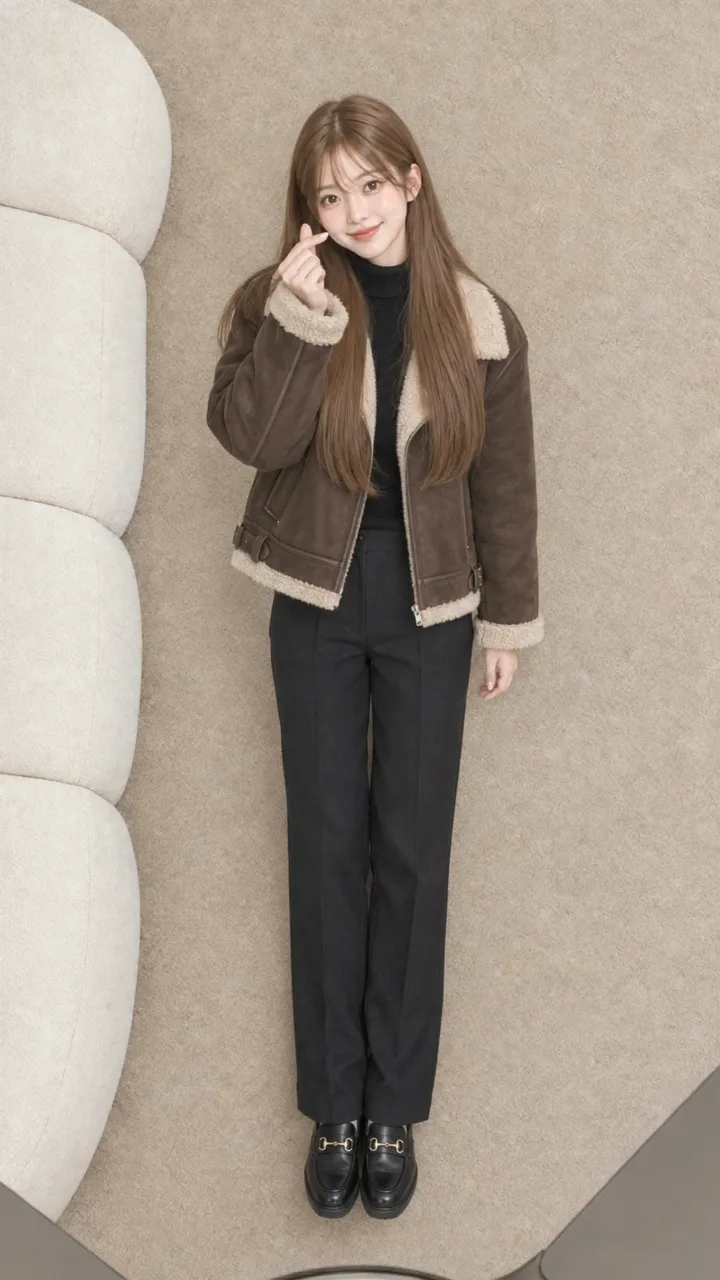
Result Look 3. Shearling jacket, black turtleneck, and slacks.
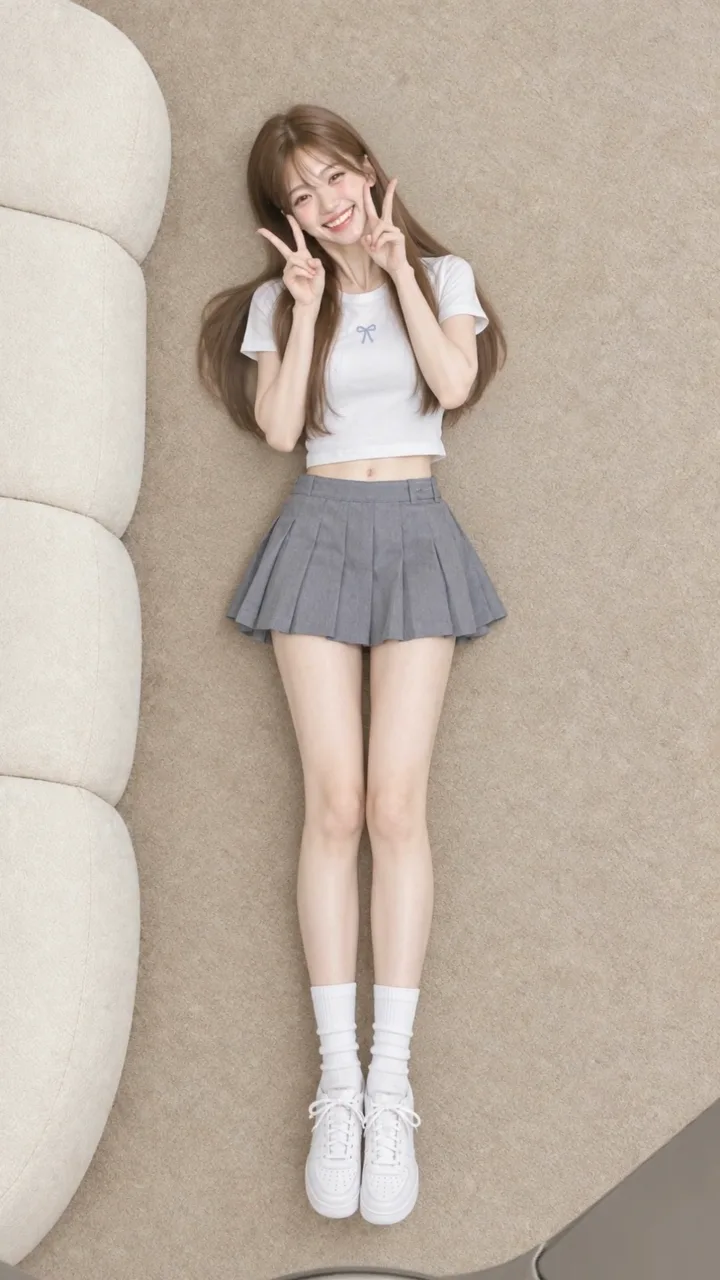
Result Look 4. Pleated mini skirt and a cropped tee.
Downloads
The skill file to attach in the AI Agent chat.
- Under the fan skill file v2.1MD · 9 KB · Attach this markdown file as is in the AI Agent chat. Written in Korean; the agent answers in your language.Download
What you need
This is all the skill needs. Put it in your project before you ask the agent.
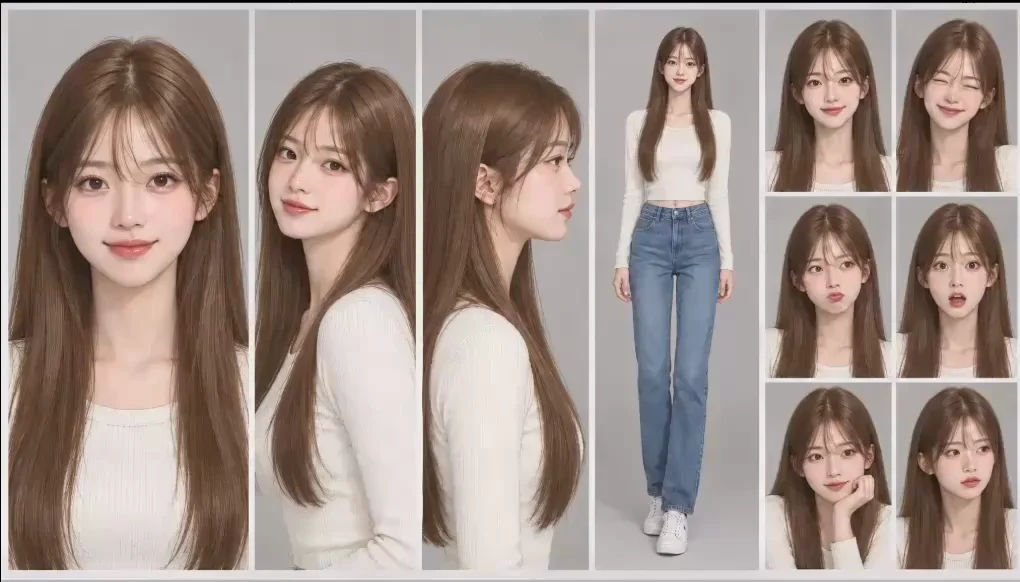
photoOne photo of the person
A clear, front-facing, full-body photo works best. The example used a character sheet with several face angles and a full-body view in one image.
A person lies on a carpet right under a ceiling fan, and every time a blade sweeps over them the outfit changes. That is the #underthefan reel. Attach this skill file in YouViCo’s AI Agent chat and put one photo of the person in your project, and the agent works through image generation, video editing, and export in order.
What a skill is
A skill is a markdown file that tells the AI Agent which steps to follow. A prompt says what to make in one go; a skill says in what order to make it and what to check along the way: which files to create first, what to compare each result against, what goes where on the editor timeline, and how to fix the usual failures.
That lets you start a multi-step job with one message. An under-the-fan reel normally means several images, several clips, fan rotation keyframes, transitions, and music, all lined up by hand.
What this skill makes
- A 9:16 vertical reel, 1080×1920, 30fps, about 16 seconds
- A fixed top-down view: the person lies on a beige carpet with a cream sofa along the left edge
- The fan starts still, eases into a steady spin, and each blade that crosses the body brings the next look
- The outfit changes with a wipe that follows the blade, so the whole body never switches in one frame and the blade seems to dress the person
- The person stays still or does cute poses only: a V sign, a finger heart, a head tilt
How to run it
- Upload one photo of the person to a project.
- In the YouViCo desktop app, open the AI Agent from the AI button in the title bar or with Ctrl/Cmd+Shift+A. The AI Agent is available in the Windows and macOS desktop apps.
- Attach the skill file you downloaded above in the AI Agent chat. Pick it with the paperclip button at the bottom left of the message box and it shows up as a file chip above your message. There is nothing to install or register. If you will use it often, save it with Import SKILL.md in the Skills view. What is a skill? explains how skills work with the agent.
- Send a request like this:
Use this skill to make the video.
The person's photo is already uploaded.
The example used the Korean message 이 스킬 사용해서 영상 제작하자 / 인물은 사진 올려뒀다. The agent asks for nothing but the photo. The Tasks tab shows the plan, explore, run, and review stages and what it is doing right now. When it finishes, the video lands in the final output folder with its status set to review.
What the agent actually did
This is a recording of the run that made the example above. Account details and the credit balance are hidden.
The steps written in the skill, in short:
| Stage | What the agent does |
|---|---|
| Set up | Creates keyframe, video, final output, and rejects folders, and finds the photo. |
| Keyframes | Makes a base shot (K1) of the person lying down in the first look, then one shot per look with only the outfit and pose changed. Checks head and feet against K1. |
| Fan | Makes a top-down three-blade ceiling fan as a separate transparent PNG. The fan is never generated as video. |
| Person clips | Makes a 5-second clip from each keyframe as its first frame. Hair moves a little in the breeze; the person never touches anything. |
| Music | Generates background music slightly longer than the video. |
| Edit | Puts the fan PNG on the top track with rotation keyframes, places each clip at the moment a blade covers the body, and adds a wipe there. |
| Finish | Fades the music out at the end, sets the export to review, and reports the timing table and what a person should check. |
The moments when a blade covers the body are worked out before anything is generated. The fan’s speed and blade angles set the switch times, and the clip lengths and wipe positions follow from them. Done by hand, that is the slowest part of the job.
Make it your own
Add a line to your request:
- Different looks. “Use a trench coat, a knit dress, a leather jacket, and a tracksuit” and the agent dresses the person in those. Without a list it uses the four default looks above.
- No sofa intro. “Skip the intro where they roll off the sofa” gives a shorter version where the fan starts turning after one second.
- A different person. Just change the photo. If the base shot’s face doesn’t match the photo, the agent remakes it, and after two failures it asks for a clearer photo.
- A different video model. The skill makes the person clips with Kling 3.0, but you can use Seedance instead. Add “Make the person clips with Seedance 2.5” to your request.
- Your own credit estimate. The credit line in the skill file is a reference. Changing the model or the number of looks changes the estimate, so edit it to match your setup. The agent checks the real cost again before generating.
The full skill file
This is the same as the download. You can also copy it into a new file.
---
name: youvico-underthefan-shorts
description: '사진 한 장 속 인물이 천장 실링팬 바로 아래(탑다운 시점) 카펫에 누워 있고, 일정하게 도는 팬 날개가 몸을 지나갈 때마다 의상(룩)이 날개를 따라 바뀌는 9:16 패션 쇼츠(#underthefan)를 처음부터 끝까지 만들 때 쓴다. 인물 사진 1장과 룩 목록만 있으면 된다. 트리거 예: 언더더팬 쇼츠, 천장 선풍기 룩체인지, 이 사진으로 언더더팬 만들어줘, 내 사진으로 의상 바뀌는 쇼츠, 팬 지나가면 옷 바뀌는 영상. English triggers: under the fan reel, ceiling fan outfit change short, make an under-the-fan video from my photo, outfit transition reel.'
---

# 언더더팬 룩체인지 쇼츠 (사진 1장으로)

적용 조건: 고정 탑다운 시점에서 인물이 누워 있고 팬 날개가 몸을 지날 때 의상이 바뀌는 세로 쇼츠를 만들 때만 따른다. 다른 요청이면 무시한다. 화면 이름은 한국어 기준이니 다른 언어 화면에서는 같은 뜻의 이름을 찾고, 답·댓글·보고는 사용자 언어로 쓴다.

## 1. 기준
- 입력: 인물 사진 1장(얼굴이 또렷한 정면·전신이면 가장 좋다). 룩 목록이 없으면 기본 4룩: ①셔츠 재킷+청바지 ②필드 재킷+비니+와이드 데님 ③무스탕 재킷+검정 터틀넥·슬랙스 ④플리츠 미니스커트+프린트 크롭 티셔츠. 사진 외에는 묻지 않고 진행한다.
- 본인 또는 동의받은 사람의 사진만 쓴다. 유명인·공인으로 보이면 진행하지 않고 알린다.
- 출력: 9:16, 1080×1920, 30fps. 룩 4개 + 도입 = 약 16초.
- 팬은 AI 영상으로 만들지 않는다. 팬 = 투명 PNG + 회전 키프레임, 인물 = 팬 없는 Kling 클립.
- 옷 바꿈은 날개를 따라가는 와이프. 사람 전체가 한 프레임에 바뀌면 실패. 컷만 쓰거나 dip-black을 쓰지 않는다.
- 인물은 가만히 있거나 귀여운 포즈만(브이, 볼 하트, 고개 갸웃). 소품을 만지는 동작 금지.
- 팬은 마지막 프레임까지 보인다(불투명도 페이드 금지).
- 크레딧(참고, 실제는 `estimate_ai_generation`): 이미지 (룩 수 + 2)장 × 약 40, Kling (룩 수 + 1)개 × 약 65, BGM 1개. 4룩 ≈ 240 + 325 + BGM.

## 2. 시간 계획 (생성 전에 먼저 정한다)
- 회전: 0–T0초 30° 정지(도입) → T0–T0+0.5초 ease-in으로 20° → 이후 초당 40.1°로 감소(음수 방향, 날개가 오른쪽→왼쪽으로 지나간다).
- 날개 i(상대각 aᵢ, 기준 날개 0°)가 몸을 덮는 시각: tᵢ = (T0 + 0.5) + (20 + aᵢ) / 40.1.
- 참고 값(T0 = 6.4, 날개 0/128.4/231.6/360°): 7.40 / 10.60 / 13.17 / 16.38초. 새 팬 PNG면 aᵢ를 캡처로 다시 잰다(§3-6).
- 구간: 도입·룩1 0–t₁, 룩2 t₁–t₂, 룩3 t₂–t₃, 룩4 t₃–끝(끝 = t₄ − 0.5, 예: 15.9). 도입을 빼면 T0 = 1.0.
- 클립마다 필요한 원본 길이 = 구간 길이 + 앞뒤 0.6초(와이프 1.2초용). Kling 5초면 충분하다.

## 3. 단계 (1–5: 소재)
1. `update_task_scope`로 단계를 등록한다. 사진은 `list_project_files`로 찾고, 사용자가 로컬 경로를 주면 `upload_local_file`로 올린다. 폴더: 키프레임 / 영상 / 최종출력 / 탈락(`create_folder`).
2. K1(GPT Image 2.5, 참조 [사진]): "Vertical 9:16 realistic photo shot from directly above (camera on the ceiling, perfectly top-down, no perspective tilt). The person from image 1 lies on their back on a plain beige carpet, full body centered, head at about 15% from the top, feet at about 85%, arms relaxed at the sides. A cream curved modular sofa runs along the left edge. Soft even daylight, no harsh shadows. Wearing <룩1>. Exactly the same face and identity as image 1. No ceiling fan, nothing above the person, no text." 캡처로 얼굴·전신·머리/발 위치를 확인한다. 이 K1이 이후 모든 구도의 기준이다.
3. K2…Kn(참조 [K1, 사진]): "Keep exactly the same camera, carpet, sofa, lighting, body position, body size and framing as image 1. Change only the outfit to <룩N> and the pose to a cute pose (V-sign near the cheek, smiling). Same face as image 2. No ceiling fan, no text." K1과 나란히 캡처해 머리·발 위치가 캔버스 높이의 3% 안에서 같은지 본다. 어긋나면 그 장만 다시 만든다.
4. (도입, 선택) S0(참조 [K1, 사진]): "Keep exactly the same camera, carpet, sofa and framing as image 1. Same person and outfit, now lying on the cream sofa on the left, about to roll off onto the carpet. No ceiling fan." 구도가 다르면 1회 다시 만들고, 실패 파일은 탈락 폴더로 옮긴다.
5. 팬 PNG(GPT Image 2.5, 참조 없음): "Square 1:1, fully transparent background, a ceiling fan seen from directly above, hub exactly centered, three identical wide taupe blades, one pointing straight up, brushed metal hub, no shadow, no ceiling." 프로젝트에 이미 있으면 다시 쓴다.

## 3. 단계 (6–13: 편집)
6. 편집본(새 영상 편집본, 1080×1920): 팬 PNG를 V3에 `add_clip_to_timeline`, `set_layer_transform` scale 1.8, x 0.5, y 1.0. 회전 0°에서 날개가 머리–발을 덮는지 캡처한다. 회전값을 바꿔 가며 다른 날개가 수직이 되는 각 aᵢ와 0°/120°/240°의 허브 위치를 재서 회전축 거리 r(px)을 구한다(참고 예: r≈203).
7. 키프레임: `set_keyframes`로 rotation(§2 3구간), x·y 허브 보정(정지 구간은 30° 위치로 고정, 회전 구간은 15°마다 x = 0.5 + (r/1080)·sinθ, y = y0 − (r/1920)·cosθ, 참고 예: 0.5+0.188sinθ, 1.026−0.1057cosθ). opacity 키프레임은 넣지 않는다. 팬 클립 길이 = 영상 끝.
8. 인물 클립(Kling 3.0, 1080p, 5초, 9:16, `generateAudio` false, 첫 프레임 [Kn]): "Use the attached image as the exact first frame. Locked top-down camera, no camera movement, no zoom. The person stays mostly still and does cute poses: smiles at the camera, keeps the V-sign near the cheek, gentle head tilt, playful blink. Hair moves slightly as if a ceiling fan breeze blows from above. Hands never touch any object. Same outfit, framing and lighting throughout. No ceiling fan visible, nothing enters the frame, no text." 도입 클립은 첫 프레임 [S0]에 "rolls off the sofa and lies on the carpet in the same position as the person in image 2"를 쓰고 참조 [S0, K1]. 클립은 모두 동시에 시작해 기다린다(`get_ai_generation_status`).
9. BGM(Seedance 2.5 또는 2.0 Mini, 480p, 길이 = 영상 끝 + 1초 이상, 소리 켬): 음악 위주, "upbeat indie pop, no vocals". 배속으로 늘리지 않는다.
10. 배치: 각 클립을 빈 자리(80초 이후)에 넣고 `seek_editor` + 캔버스 캡처로 좋은 구간을 고른다. 구간 앞뒤 0.6초가 원본 안에 남도록 `trim_clip` → `move_clips`로 §2 구간에 붙인다.
11. 전환: 룩2부터 각 클립에 `add_transition`(edge start, kind wipe, direction left, 1.2초, alignment center). 회전이 양수 방향이면 direction right.
12. 소리: BGM을 `add_clip_to_timeline` audioOnly로 A2, 끝에 맞춰 `trim_clip`. 끝 1.5초를 0.5초씩 `split_clip`, `set_clip_volume` 0.6/0.32/0.1.
13. `export_draft`(0–끝, 최종출력 폴더) → `set_file_status` review. 파일명 예: `<이름>_언더더팬_v1.mp4`. 생성 파일은 내용이 보이는 이름으로 `rename_file`.

## 4. 확인
- 각 tᵢ −0.15초·+0.3초 캡처: 날개 왼쪽은 이전 룩, 오른쪽은 새 룩, 경계선이 날개 밖으로 보이지 않으면 통과.
- 각 룩 구간 중간: 사진과 같은 얼굴, 요청 의상, 소품 미접촉, 팬 없음.
- 마지막 0.1초에도 팬이 보인다. 0°/120°/240° 허브 위치 차이는 캔버스 폭의 3% 이내.
- 결과 파일 뷰어 시점 실측이 "코덱을 디코딩하지 못했습니다"로 막히면 편집기 `seek_editor` + 캔버스 캡처로 대신하고, 소리는 사람이 들어야 한다고 보고한다.

## 5. 실패했을 때
- 전환에서 검은 화면: 클립 끝에 남은 dip-black(트림하면 같이 따라온다) → 화면 전환 탭에서 전환 삭제(앱 확인 필요).
- 경계가 날개 밖으로 보인다: 와이프 길이를 1.0–1.6초로 바꾸거나 경계 시각을 ±2–4프레임 옮긴다. 룩끼리 몸 크기가 다르면 해당 Kn부터 다시 만든다.
- 얼굴이 사진과 다르다: K1만 다시(참조 [사진] 먼저, "exactly the same face"). 두 번 실패하면 더 선명한 사진을 요청한다.
- Kling에 팬·물체·소품 만지기가 나온다: 금지 문장을 강화해 1회만 다시 만들고, 나머지는 좋은 구간만 쓴다.
- 피드백 답글: `reply_comment` 전에 그 파일의 `list_feedback`을 먼저 조회한다.

## 6. 보고 형식
결과물(파일명·폴더·길이), 구간표(시간·룩·전환), 확인한 시점, 사람이 볼 부분(소리, 경계), 크레딧 견적 합계(예약, 실제는 같거나 적음).

변경 기록: v1.0 2026-10-05 첫/끝 프레임 와이프 / v1.1 팬 PNG + 회전 분리 / v2.0 사진 1장 입력, 날개 따라 와이프, 팬 페이드·dip-black 금지, 정지·귀여운 포즈 / v2.1 2026-10-05 시간 계획을 생성 전으로 이동(덮는 시각 식), 정지→ease-in→일정 회전 3구간, K1 구도 기준 비교, 소파 도입 선택 단계, 와이프 여유 0.6초, BGM 길이 맞춤 생성, 기본 4룩, 크레딧 식
Tips before you run it
- Use only your own photo or one you have permission to use. The skill stops and tells you if the photo looks like a celebrity or public figure.
- A large, clear face works best. Every keyframe follows the face in the first base shot, so that shot has to be right for the person to stay the same to the end.
- It uses AI generation credits. It makes several images, several clips, and one music track, so it costs more than a single prompt. The agent checks the estimate before generating, and it varies with the model and the number of looks.
- Listen to the sound yourself. The agent checks the blade edges and faces with screen captures, but it reports that a person needs to listen to the music.
FAQ
Do I need anything besides the photo?
No. The agent makes the fan image, the carpet and sofa background, and the music. If a fan PNG is already in the project, it reuses it.
What if I don’t like the result?
Say what to fix in the same chat. The skill covers the usual problems and how to fix them: a black frame at a transition, a wipe edge showing outside the blade, or a face that drifts from the photo.
Can my team leave comments on the result?
Yes. The result is an ordinary video file in the project, so it takes timestamped comments and drawings like any other. When the agent answers feedback, it reads that file’s feedback list first.
Will there be more skills?
Yes, in this Skills section. Jobs that one prompt can finish go in Prompts; jobs you hand to the agent as several steps go here.
Run this skill in YouViCo
Upload a photo to your project, open the AI Agent, attach the skill file in the chat, and ask it to make the video.